There are no items in your cart
Add More
Add More
| Item Details | Price | ||
|---|---|---|---|

Whether it's jewelry design, engineering, or architecture, Rhino 3D with its vast options has somehow become the need of the hour. One needs to learn this software in order to stay on top of the competitive edge of the industry.
{{DATE}}
Aren’t we all aware of the wonders Rhino 3D creates? This software has become one of the most talked about and enticing in the field of design. From its application in computational and parametric designs to preparing a simple design proposal, there’s a lot that can be explored within this 3D software.
Mathematical operations aid in coming up with precise models and data for every design. The only con with this platform is the limited guidance that’s available for students or professionals. But that shouldn’t bother you anymore!
We’re here with 15 great tips that will help you generate even the most complicated design smoothly without any obstacles.
Before we plunge into the tips, let’s get acquainted with Rhino 3D first. Rhinoceros 3D is a surface modeling tool with a plethora of prospects that aid in specifying the design skillfully. This software is based on the Non-uniform rational basis spline (NURBS) model that lets you generate precise curves and surfaces. Several tools enable you to bring even the most complex or organic vision to reality with its detailing and scanning.
What makes Rhino 3D so unique to be learned and applied is its ability to generate even the most irregular shape with precision. Initially, Rhino was designed for the industrial design sector to create complex geometries. Later, the NURBS found its application in the field of architecture as it creates anything and everything from simple lines to free-form structures.
Rhino isn’t a single platform, rather composes an eco-system where several plug-ins come together for visualization, climate analysis, and even BIM applications. Another advantage of studying Rhino is its user-friendly software and one can expect continual evolution for it to stay compatible with the new-age designs.
Image Source: BIM Corner
While you see standard viewports in Rhino 3D, you can close them and add your own views for convenience. Go to the viewport layout and opt for the new viewport. Browse to the named view section and name your view.
This makes it easier to go to and fro for views in just one click. You can either work with different screens at one or pick your desired view and take it to another screen for a whole view of it.
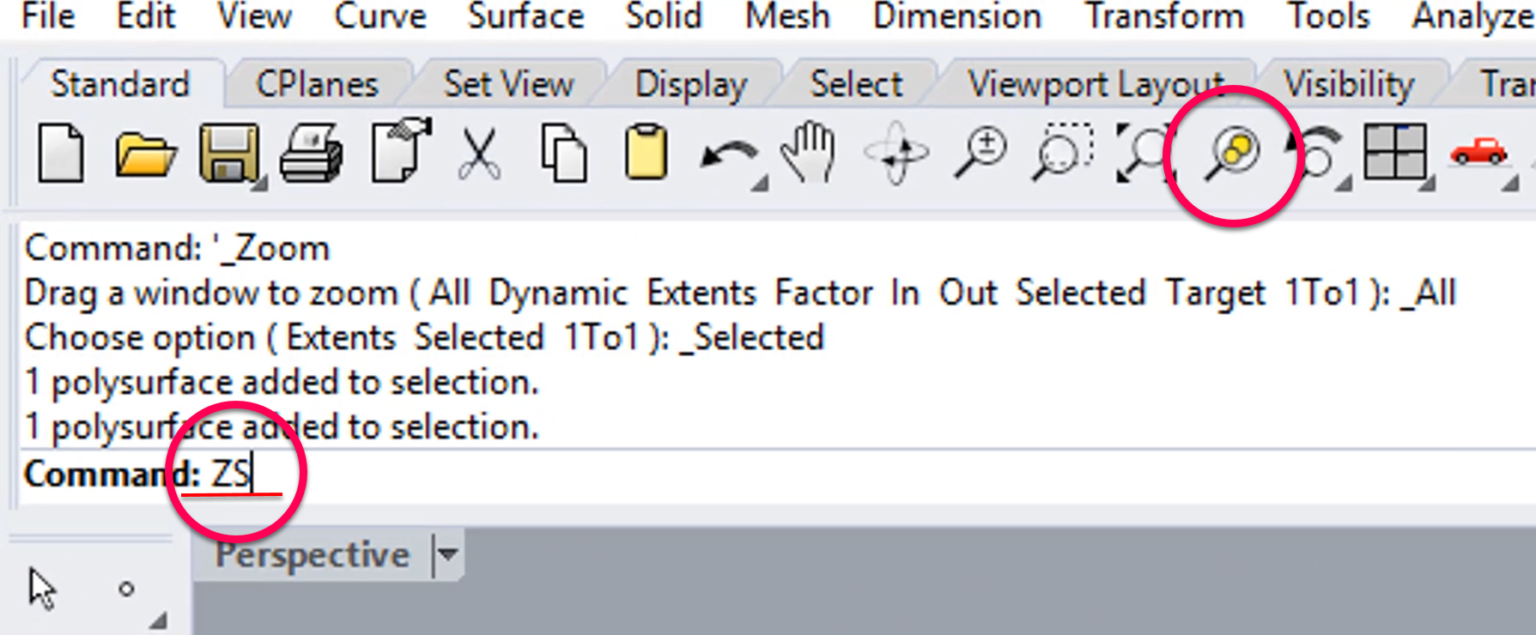
Image Source: BIM Corner
It’s a very common thing to lose a particular geometry while you work in a view. This could be either a result of zooming out a lot or rotation. And to avoid such a situation, Zoom and Select or the ZS command come as a savior.
Select the object and zoom it into another view while you hold Shift or Ctrl to activate the selected geometry in the empty view. With ZS, the lost geometry will come back.

Image Source: BIM Corner
Have you ever heard of Geometry Pipeline in Rhino 3D? Rather than selecting and updating the geometry manually every time you update, you can use this tool and make your job quicker and easier.
This is an inbuilt solution offered by Grasshopper that links the Rhino model and enables you to auto-reference any of the desired geometry. This tool can be spotted under param ribbon and geometry and can be applied even on the locked or hidden components of the model.
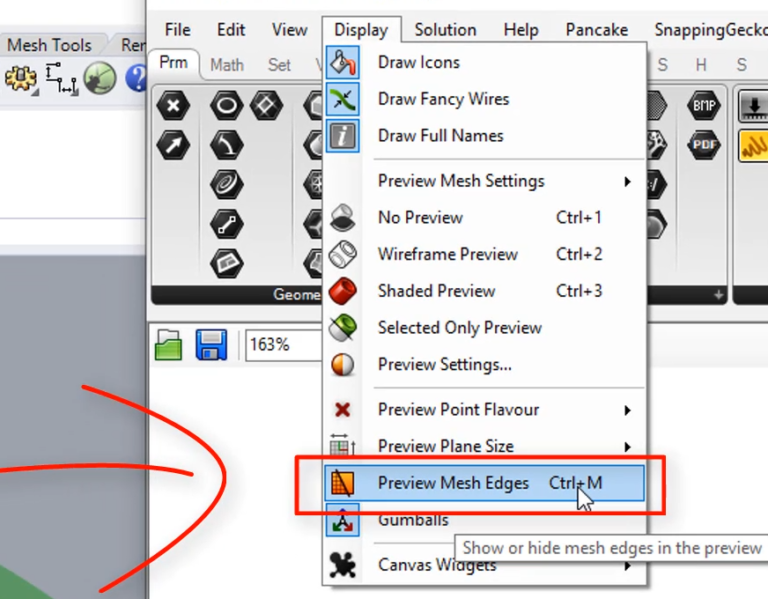
Image Source: BIM Corner
The Ctrl+M shortcut or Preview mesh edges feature under the display bar will always make the edges for mesh visible to you in the preview. While this feature is by default turned off in the Grasshopper, you can turn it on and work on the design better.
Pro-tip: Smoothen the mesh by selecting the surface and turning on the control points. Pick the control points of the desired region and give the smooth command by adjusting the smooth factor.

Image Source: global.discourse
One of the greatest tips that’ll make the usage of this software easy for you is customization. Personalize the entire popup based on how you prefer it to make the work quicker and more efficient. You can click the middle mouse button in order to open the toolbox and shift the icons by holding the Ctrl button.
Did you know all the extra snaps could be turned off? All you need to do is right-click on the snap and the rest of the set will get unchecked on its own. And in order to restore the former settings, all it’ll take is another right-click, and there you'll have all the snaps back in their place.
Image Source: BIM Corner
You can filter your selection by opting for the filter button in the select toolbox. As you click on this tool, you’ll see a window displaying the geometry filters. Pin it up on your window to always keep a check on the selection.
This will help you to check or uncheck any of the geometries. This makes it easier to even hide a few geometries while you proceed with the design. For example, you can filter and select the mesh while working to temporarily hide it from the screen.
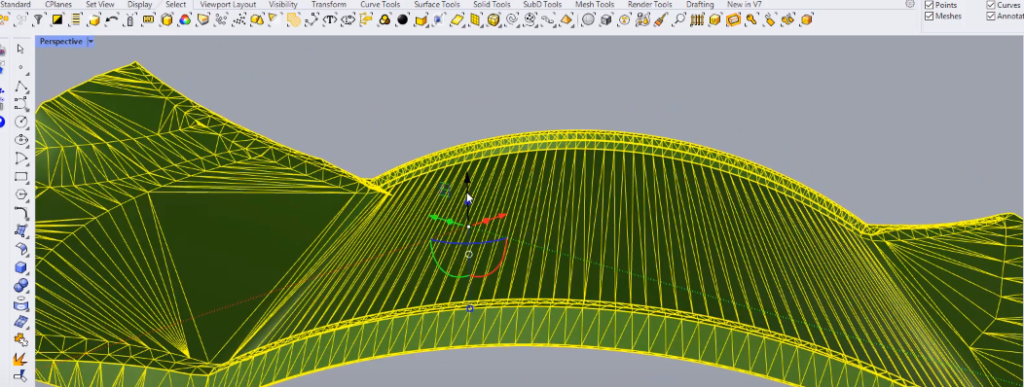
Image Source: BIM Corner
If there’s one feature you must have a full hold upon, it’s the Gumball tool in Rhino 3D. You can turn it on by clicking on it on the bottom toolbar. This tool will display a 3D system as you select any object from your screen. These extra lines displaying dimensions portray each plane and can be used to move or rotate the object in that particular direction.
You can even scale the objects by clicking on the rectangles present at the ends. And in order to scale uniformly in each direction, hold the Shift button. And the circle in the center will offer you a range of options that'll help you align the model or customize the gumball settings.
Moving geometry in Rhino without intending to can ruin the entire project if it doesn’t get noticed. This is why it’s better to opt for the select and drag option. Go to the settings and opt for the option of Drag selected objects only. This prevents the moving of anything extra that’s not selected by you.

Image Source: Pinterest
You can form and compose sketches in Grasshopper which makes visualization easier. With the function of Load from Rhino, you can select the sketched line and import geometry on the Grasshopper canvas. Whether it’s a simple line or text, anything or even the whole dwg file can be imported as a colossal script.
Pro-tip: You can build your own components in Grasshopper with the application of coding languages like Python, VB Scripting, or C#.
Image Source: Arch2o
There are a plethora of options when it comes to plugins in Rhino 3D. You can pick the ones that support your project and help you save time on the work. These will let you work along with BIM and help you with the design, execution, and operation of a structure. Apart from BIM advantages, you can also derive data from the climate analysis and take your project in a greener direction.

Image Source: Pennarchtank
Gumball has a set of features that help you explore and transform various geometries. One such option is naming positions and scaling the objects. In order to name the arrows, click on the top and write the number. You can drag the square handles in order to scale the object in a particular direction or scale up or down entirely by pressing Shift.
The gumball tool will help you align the objects with the axes. You can either align the entire object with the construction plane or specifically in a direction for meshes, curves, and planar objects. The Gumball Alignment command will reset the settings for the widget alignment.
While you’re freely playing around with the geometry, a few keyboard buttons might prove to be extremely useful. Pressing the Shift button will block orto directions. And the TAB key before the second click will block the axis of the first pick point and your cursor position. This will help you define the direction to pick your second point.
These two vector-freezing commands work well with any other feature that demands you to give direction inputs.
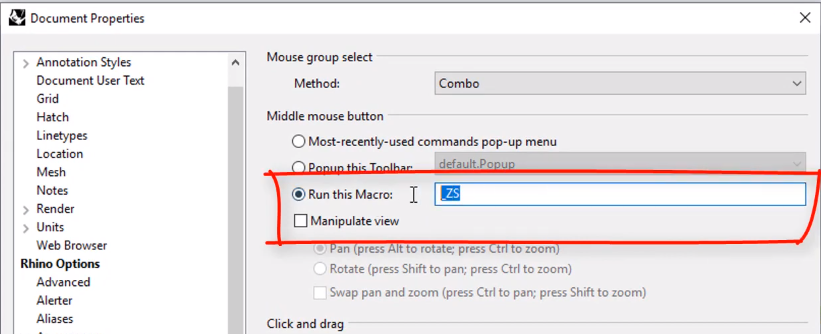
Image Source: BIM Corner
You can customize the role of your middle mouse button. Open the Options and go to Mouse and Click feature. The best feature is to add ZS in front of the Run this Macro option for the smart zoom select function. Now you get that feature with a single click than typing the entire command.
Whether it's jewelry design, engineering, or architecture, Rhino 3D with its vast options has somehow become the need of the hour. One needs to learn this software in order to stay on top of the competitive edge of the industry.
Upskilling is the way forward and what is better than doing it while at home? Futurly+ is a premier learning platform, especially for designers and architects where you can upskill in the AEC industry and find your community!
Futurly + Rhino Core by Omar Kaddourah (Architect, Zaha Hadid Architects, UK / UAE) equips you to create hook-worthy presentations and architectural drawings with Adobe suite and Rhino. Taking an unconventional and never-seen-before path, this course highlights creating an interactive portfolio.
Upskill and Upgrade within your industry, To know more- https://www.futurly.com/s/store/courses/description/Rhino-Core

Is Rhino 3D easy to learn?
Whether you’re a fresher or an advanced Rhino 3D professional, this design and computational software are easy to learn by all. The plug-ins further make it easier to work on this platform.
How much does Rhino 3D cost?
This highly-efficient software costs something between $700-$1000 for its licensed version after a 90-day free trial is availed.
What can Rhino 3D be used for?
Rhino 3D isn’t only a great software for architectural design but product designing and even 3D printing.
What are the best places to learn Rhino 3D?
The best way to learn Rhino 3D is by signing up for online courses that’ll teach you this software level by level.
Why do architects need to learn Rhino 3D?
Whether it’s a sketch or a highly-precise model, Rhino 3D lets you work from scratch to the end which is why it’s important for architects to learn. It’ll help in designing, drafting, visualizing, and even 3D scanning.
References:
https://academy.archistar.ai/15-rhino-3d-secrets-you-need-to-know
https://bimcorner.com/15-rhino-tips-while-working-with-grasshopper/
https://www.oneistox.com/blog/ultimate-guide-to-rhino-3D
https://www.oneistox.com/learning-hub/blog/your-guide-to-rhinoceros-how-easy-is-it-to-learn-rhino-3d
https://www.punchat.in/funpun-1/nbspall-you-need-to-know-about-rhino
https://www.sculpteo.com/en/glossary/rhinoceros-definition/
https://www.3dnatives.com/en/rhino-3d-modeling-software-080420205/,https://docs.mcneel.com/rhino/5/help/en-us/commands/gumball.htm

{{AUTHOR}}
An Architect + Writer, Saili has worked as an Architectural writer & brand storyteller where she has collaborated with firms, studios, organizations, luxury brands, events & educational institutions to communicate in the real estate & travel industry. Her recent initiatives include curating an online workshop on communication and networking within the AEC industry. She is a commentator on the design industry’s upkeep through her social handles while also being an avid reader and traveler.